It is necessary to first choose the batch for which to create pay slips. In the case of payslip creation, it is possible to select multiple batches to work with. This is achieved by selecting the desired number of batches.
1. To finalise a current pay run, select a menu path of Processes Ø Finalise Pay Run Ø Current Pay Run>Period
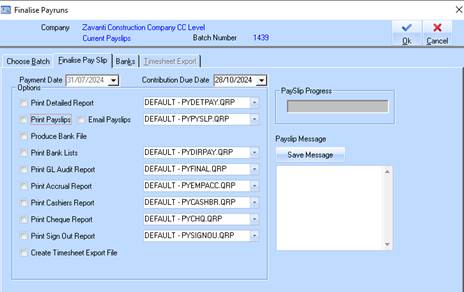
2. Select a batch line item you wish to finalise and press the Finalise Pay Slip tab.

3. Pay Date is not editable on the Finalise Pay Slip tab date has defaulted to Pay Date selected when creating the Batch.
4. This tab allows you to select the reports you wish to print upon finalisation. Each report will be output to the user screen for perusal. Select a printer and print the report. After each report is printed as message will be displayed asking if it has printed correctly. Ensure each report is printed before responding. This will continue until all reports are printed.
5. A data field ‘Contribution Due Date’’ is on the Finalise Payslip tab. This will default to quarterly reporting date based on Government recommendations. This can however be manually changed if you wish to report monthly.
6. You have the option in the Batch Finalise process to enable the user to email payslips. It is advisable review all hard printed process first to verify data. Then email process only. Refer to Systems Administration for instructions on setting up SMTP function for large email runs.
7. When the Payroll is processed, this ‘Contribution Due date’ and “From” and “To” pay periods the date are shown on the Payslip.
8. When the Email Payslips option is checked the user is unable to select Print Payslips at the same time and will need to go back and reprint manual payslips if they are required and not done previously.
9. It is advisable as you would do normally to print the Detailed Report to check and verify the data.
10. When the user is satisfied that the batch is correct, print any other reports, payslips (if required), bank file creation etc.
11. When the message “Finalise” is displayed, click on NO.
12. Go back to the ‘’finalise payslip process’’ and check the email payslips.
13. If you are using your outlook link to email you will be prompted with the following message. Alternatively you may set up a bulk email capability using SMTP protocols as explained below.
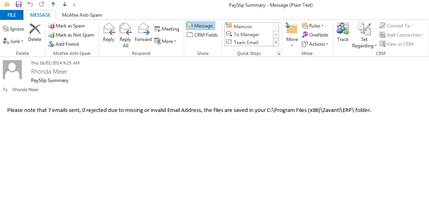
14. A summary of the email status is then displayed to the Operator and emailed.
15. When all reports have been confirmed a message will be displayed “Finalise complete do you wish to commit?” It is a good idea to ensure the payroll is correct prior to the committing as there is no reversal function. If you wish to delay the commitment of the payroll answer “No” and cancel out of the Pay run. This will leave the batch there until the user has confirmed all the printed output. At this point in time if there are corrections to be made then the user just needs to go back and edit the timesheets prior to the finalise process again. If there are no changes to be made and you are happy with the result go back into the finalise process and uncheck the print options and click on Ok. This will then proceed straight to the finalise and commitment option
16. Note that the batch no longer appears in the batch window once the finalise and commitment process is completed.
17. When journals are consolidated in the Payroll Finalisation both the batch number and description appear in the journal description.
18. This is a sample of email sent to employee with payslip attached

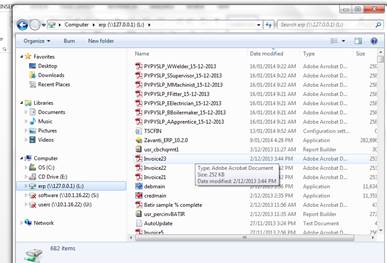
19. This is sample of the email sent to the user confirming number of email sent or rejected. It also shows that copies of the pdf payslips are saved in the ERP folder.

20. It is recommended that the user set up a user specific folder to save these files to, see Systems Maintenance.