
Before starting to access API, you must register a new Dynamics 365 App. To do this you will create a unique App ID with specific right to access your dynamics 365.
1. First you need to connect to Azure Portal with administrator credentials.
2. From the homepage, click on Azure Active Directory -> App Registration-> New Registration
3. In the Application registration form, you must enter some information:
•Name: this is the name of the registration app. Enter a meaningful one.
•In the Supported account types part, select Accounts in any organizational directory.
•Set the redirectUrl. In our case, let’s use Web and http://localhost
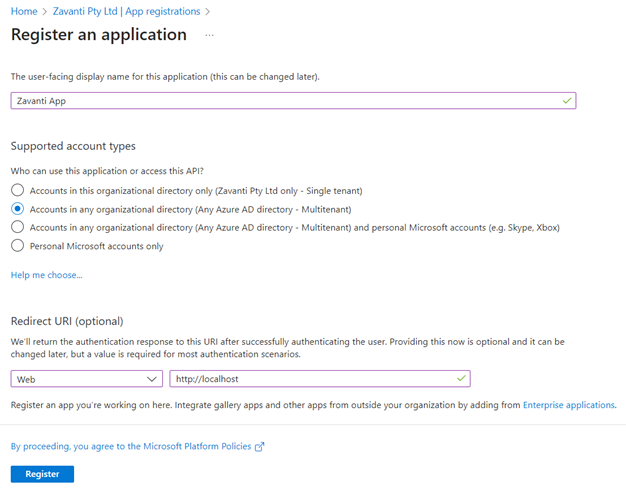
4. Then click on Register.
5. nce your application is registered, you can find the following from the overview.
- the application id
- The tenant id
6. Copy and save these somewhere as you will need it later.

7. Now go on API permissions

8. Click on Add a permission.

9. Select Dynamics CRM under the API Microsoft Graph tab.

10. Click on Delegated permissions, check the options and click on Add permissions.
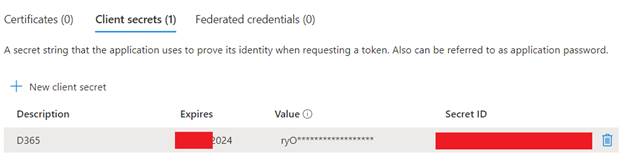
11. Now Click on Certificates & Secrets and create a new client secret.

12. Add a name and define the expiration duration of your secret value.
13. Then click onAdd.
14. Your client secret is now created. Copy and keep its value somewhere safe because you won’t be able to copy again once the page is reloaded.
15. Your app is successfully registered and setup.
16. You will now be able to get your token and contact dynamics 365 API.