Debit Journals may be entered to reduce a Suppliers Balance.
1. To create a debit journal, select the Dr Jnl icon or a Menu Path Transaction Ø Debit Journals. The following window will be displayed:
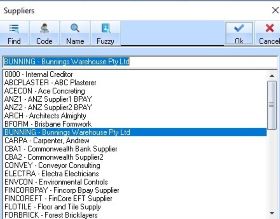
2. Select a Supplier from the list and press OK or enter. The following window will be displayed:

3. Select a Period
from the drop down by pressing the  arrow and select an
entry from the list. Press the Tab key on your keyboard.
arrow and select an
entry from the list. Press the Tab key on your keyboard.
4. The entry in the Date field will default to the current date. Leave the entry as defaulted and press the Tab key.
|
|
To change the date you may overtype the defaulted
value or, to select from a calendar, press the |
5. In the Reference field, enter a 5 character value of any character combination and press the Tab key.
6. You will note that the value in the Description field defaults to Dr Journal. Amend the defaulted description if required. Press the Tab key.
7. The Tax Code field
will default to *NONE*. This is a restricted entry field. To select
from a list of allowable entries, press the arrow and select
from the list. Press the Tab key.
8. In the Journal Value field, type a value. You will note that the Debit and Credit display will be updated as you enter data.
9. The system defaults the General Ledger account to be credited with Trade Creditors Control Account.
10. Leave the first Line
Item as defaulted and position your cursor in the Account field beside the
second  arrow.
11. Select arrow in the Account field. A
scrollable list of all General Ledger accounts will be displayed. Select a
valid entry and press the Tab key.
|
|
Journal entries must comprise Credit and Debit amounts of equal value. If entries are not equal, the “Out of Balance” field in the Balances Display area of the window will display the amount that the journal is out by. |
12. To save your record, press the OK Button. The Journal Entry is saved and balances updated as per your entries.
