To enter a balance manually,
1. Press the Add Bal button from the Toolbar and select the Last Row option.
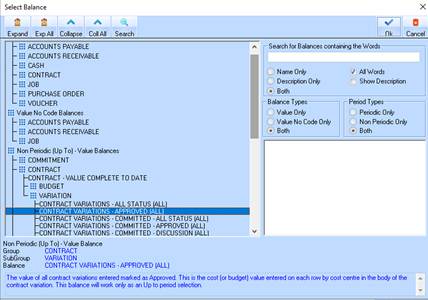
2. Position your cursor in the Balance field and right mouse click. The following window will be displayed:
3. Select the appropriate balance you would like from the tree structure. For the purposes of this exercise, select a tree path of Non-Periodic (Up To) – Value Balances Ø Contract Ø Variation Ø Contract Variations – Approved (ALL).
4. Press the OK button.
5.
Position your cursor in the Print Balance field. Select the checkbox  within the
field.
within the
field.
6. Position your cursor in the Balance Style field and right mouse click. Select a style from the list and click the OK button.
7. In the Column Heading field, enter an appropriate column heading. For the purposes of this exercise, please enter the value “Variations”.
8. Position your cursor in the Heading Style field and right mouse click. Choose an appropriate style and click OK. For the purposes of this exercise, please select the value “Normal”.