1. To enter balances using the Wizard function, select the Add Balance button and select the “Last Row” option.
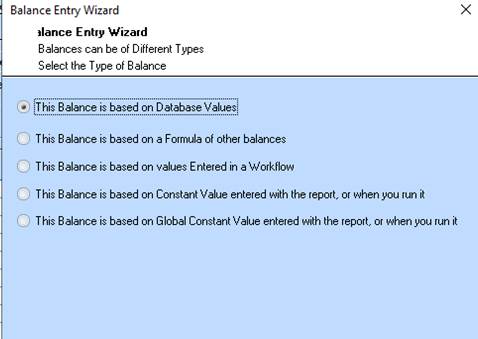
2. Position your cursor in the Balance field and press the Wizard button. The following window will be displayed:
3. Leave
the This Balance is Based on Database Values radio button  as
defaulted and press the Next button. The following window will be displayed:
as
defaulted and press the Next button. The following window will be displayed:
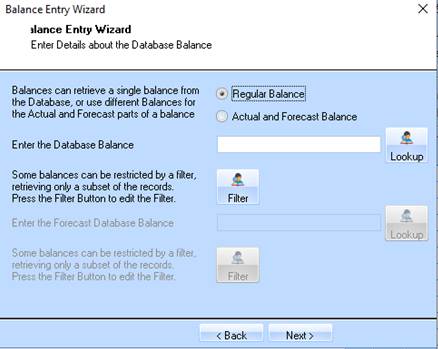
4. Leave
the Regular Balance radio button selected. Position your cursor in
the Enter the Database Balance field.
5. In the Enter the Database Balance field press the Lookup button. The following window will be displayed:
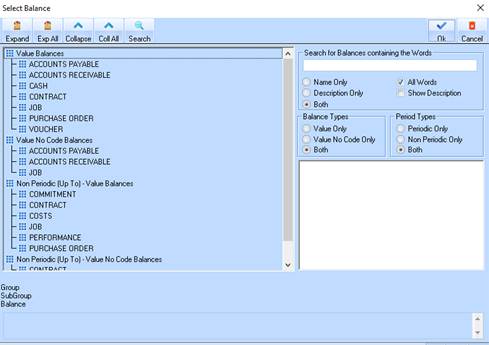
6. For the purposes of this exercise, double click the JOB directory that is in the Non-Periodic (Up To) – Value No Code Balances tree. Then select the BUDGET item and finally the JOB – ORIGINAL BUDGET entry. Press the OK button.
7. When the Wizard window is displayed press the Next button. The following window will be displayed:
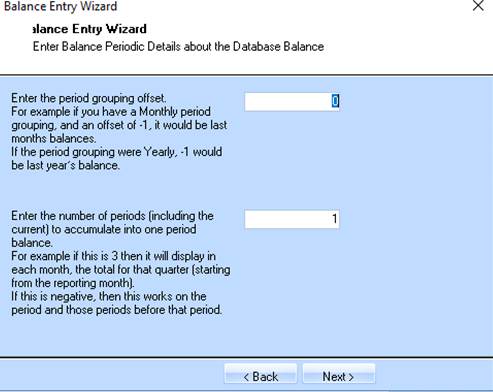
8. Leave the settings as defaulted and press the Next button. The following window will be displayed:
9. Leave
the Print this Balance radio button selected as defaulted.
10. Select the
Auto Size the Column radio button .
11. In the Enter Balance Style field, select the Lookup button and select a style from the list. Press the OK button.
12. Position your cursor in the Enter the Column Heading for this Balance field and enter a valid column heading. In this case, enter a value of “Original Budget”.
13. In the Enter the Column Heading Style field select the Lookup button and choose the Excel Style for the Column Heading. Press the OK button.
14. Select the Next button. The following window will be displayed:
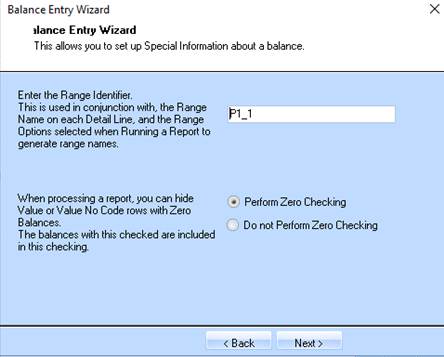
15. In the Enter Range Identifier field enter an identifier for this Balance. For the purposes of this exercise, enter a value of “P1” for Period One (1).
16. Select the
Perform Zero Checking radio button . This ensures that Power Writer will check
that values exist before outputting them to Excel so you do not have a report
with zero values.
17. Press the Next button. The following window will be displayed:
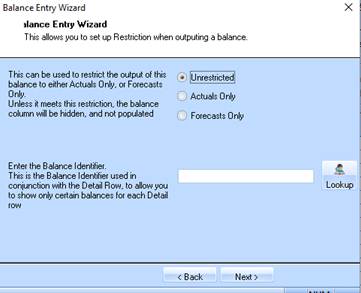
18. Select the
Unrestricted radio button . This will ensure the data is not restricted
to actual or forecast data and will output the data in that balance.
19. Leave the Enter the Balance Identifier field blank and press the Next button. The following window will be displayed:
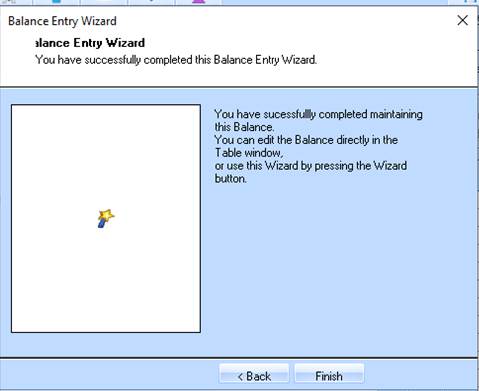
20. Press the Finish button. The following window will be displayed: