The sales process enables you to take a lot of land or an improvement and process the various functions needed in your industry. Following is an outline of these functions:
•Define and process any Cost of Sales Accruals on the sale. A cost of sale accrual is an item such as Legal Fees, Commissions, Interest Fees etc. that you wish to recognise at the time of sale.
•Enter your contract information and any dates, terms, interest rates, trigger dates etc that would go with the contract. The contract feature can also be used to produce a paper-based contract by using the ODBC link to MS Word that is provided with this software.
•Enter/Allocate and process any deposits that you have taken against the lot. These can be either Third Party Deposits that is deposits that are held by say a real estate agent or a lawyer, or they can be deposits held by you in your own trust account.
•Enter other miscellaneous items that are part of your contract such as vendor and purchase solicitor names and addresses.
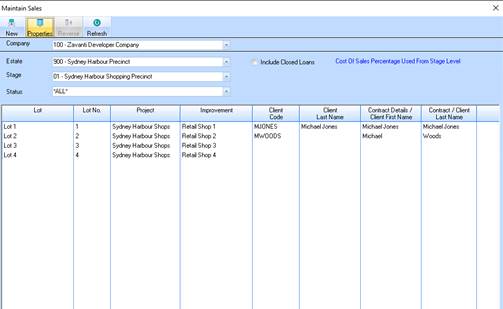
1. Select Sale button or a menu path of Transactions Ø Sales Maintenance. The following window will be displayed:
2. The sales process allows you to select a previously created/used client, by clicking the 'client' button in the Contract maintenance window. When the user selects the client, all name and address fields are automatically filled in and the user is not allowed to change these. If the user requires changes to the existing client details, they must do so from the Account Receivable module.
3. The Company pick list will default to the Most Active Company that you set up in the Sales Defaults window. Leave the value as defaulted and press the tab key.
4. The Estate pick list will default to the Most Active Estate that you set up in the Sales Defaults window. Leave the value as defaulted and press the tab key.
5. The Stage pick list will default to the Most Active Stage that you set up in the Sales Defaults window. Leave the value as defaulted and press the tab key.
6. The Status pick list will default to *ALL*. You may filter records using this field.
7. The Closed checkbox may be used to display all records regardless of whether they are active or have been closed. For example, leave the checkbox deselected and press the New button. The following window will be displayed:
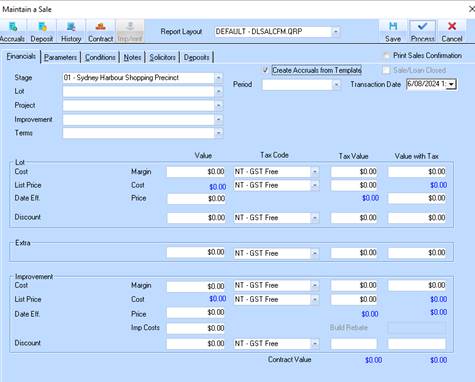
8. The Stage pick list is used to indicate the stage that contains the lot you wish to sell. Leave the value as defaulted and press the Tab key.
9.
The Lot pick list indicates the Lot that you wish to sell. Select a value from
the Lot pick list by pressing the dropdown arrow  . Press Tab.
10. If you are
selling an Improvement, you will need to specify a value in the Project pick
list by pressing the dropdown arrow . For example, we are not
selling an Improvement so leave the Project and Improvement pick lists blank and
position your cursor in the Terms pick list.
11. The Terms pick list allows you to enter the payment arrangement for a specific invoice. Select a value from the list and press the Tab key.
12. The Period is used to indicate the timeframe (month) that the sale was processed within. Leave the value as defaulted and press Tab.
13. The Lot and Improvement Sections allows you to capture the following information:
•Cost – This is a system generated field which shows you the Land Value that has been entered against the Lot or Improvement.
•List Price – This is a system generated field which shows you the Price entered against the Lot or Improvement.
•Date Eff. – This is a system generated field which shows you the date on which the current List Price became effective.
14. Select the Parameters Tab. The following window will be displayed:
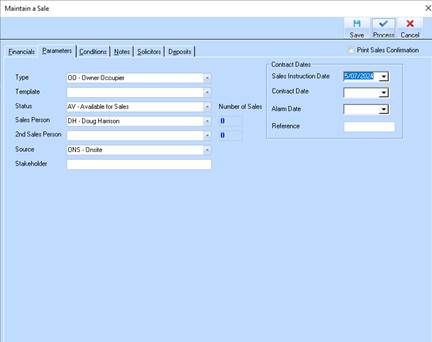
15. The Parameters window allows you to specify master data you have created to the Sale in addition to capturing relevant information such as Contract and Alarm Dates.
16. Press the Conditions Tab. The following window will be displayed:
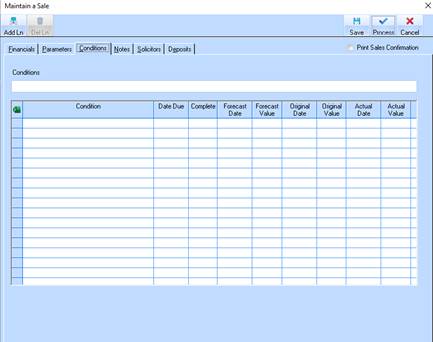
17. The Conditions window allows you to enter the long hand condition of sale. This condition is the only condition that is kept in the sales contracts table along with the primary sale and therefore available using the ODBC word processing features to create your printed contract.
18. Press the Notes Tab. The following window will be displayed:
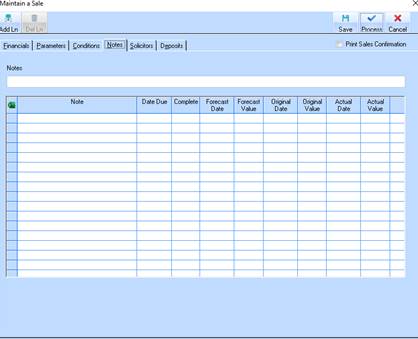
19. You may enter Notes in this window for inclusion in your Sales Contract. For the purposes of example, press the Solicitors Tab. The following window will be displayed:
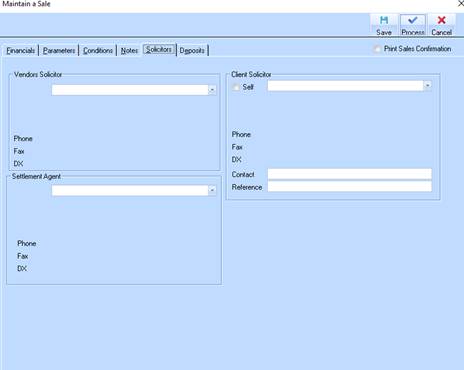
20. Using the
Solicitors window you may capture the Vendor, Purchaser and Settlement Agent
legal representation for the sale. Select a Vendor’s Solicitor from the list by
pressing the dropdown arrow and selecting a value from the
list.
21. Press the Deposits tab. The following window will be displayed:
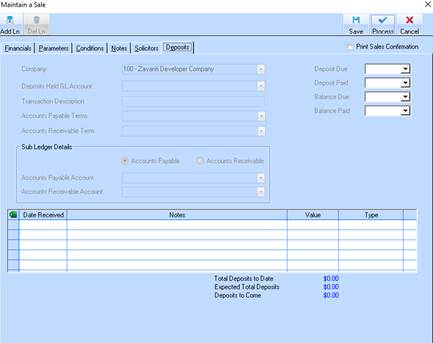
22. To enter details of deposits received, press the Add Ln button. The window will change as follows:
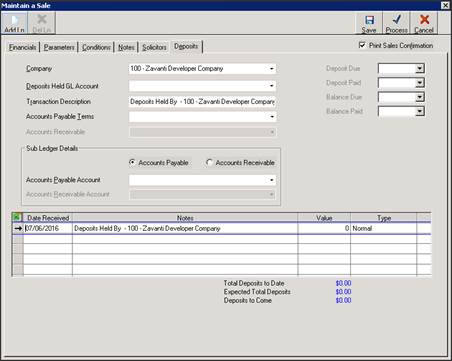
23. Select a value from the Deposits Held GL Account. Position your cursor in the Value field. Select the Save button.
24. Select the Yes button. The following dialogue box will be displayed:
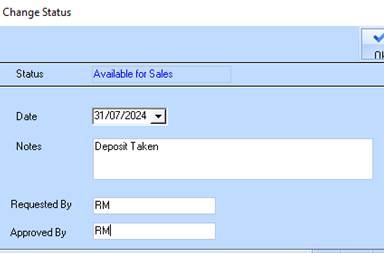
25. Enter the reason for the change in status into the Notes field. Press Tab.
26. Enter a name into the Requested By field. Press Tab.
27. Enter a name in the Approved By field. Press the Ok button. The Maintain Sales window will be displayed. Press the Refresh button. The newly created details will now appear in the list.