In the Feasibility Module
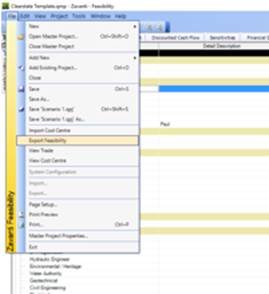
1. Open the required Feasibility and select ‘Export Feasibility’ option from the file menu
2. The Feasibility ERP integration selection window will appear. The user must enter the required fields (below) in order to create the necessary ‘export’ file details to be then used when importing into the ERP.
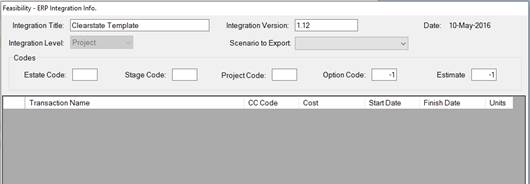
3. Select the ‘Integration Level’ from the drop down provided
•Project – Select this level if your Feasibility is for a Development at project where you have created ‘Improvement’ (Apartments, Units, Houses) STOCK items
•Stage – Select this level if your Feasibility is for a Land only Development where you have created ‘Lots’ STOCK items
4. Select the ‘Scenario to Export’ from the drop down provided. These scenarios are those you have created/maintained in the selected Feasibility and the one that has been selected as your ‘commencement’
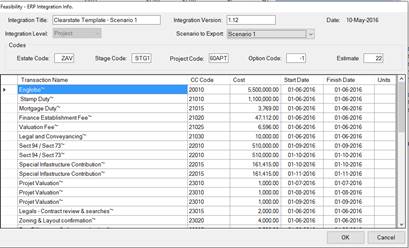
5. When selected, the Transaction level data from the specific scenario are loaded into the table window as per example below
6. Enter the ‘Estate Code’. This code corresponds to the Estate code used when creating the new Development Project
7. Enter the ‘Stage Code’. This code corresponds to the Stage code used when creating the new Development Project. All ‘Lot’ Stock maintained in the Feasibility will be created under this Stage
8. Enter the ‘Project Code’. (if Integration Level set to ‘Project’ above) This code corresponds to the Project code used when creating the new Development Project. . All ‘Improvement’ Stock maintained in the Feasibility will be created under this Project
9. Option Code – Not used
10. Enter an ‘Estimate’ Number. This number will be used when creating the Estimate that is to contain the Budget and Forecast details.
11. Click the OK button to start the export file creation process. The user will be prompted to enter a file name and location to save the Feasibility Export file.