
Note that this transaction initiates the Voucher module. If the Voucher module has not been implemented, this function will not be enabled.
Vouchers are used to register the receipt of the invoice. Details of the invoice are input details of the invoice and create a “voucher” for it within the system.
1. Select the Voucher button from the Toolbar or the Menu Path Accounts Payable Ø Transactions Ø Voucher Maintenance.
|
|
Note that this transaction initiates the Voucher module. If the Voucher module has not been implemented, this function will not be enabled. |
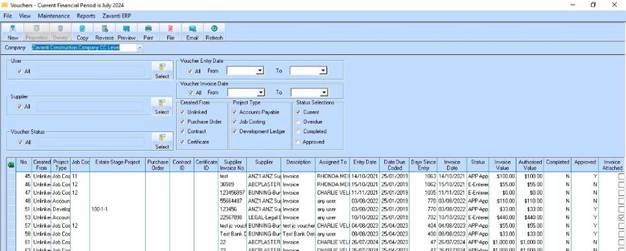
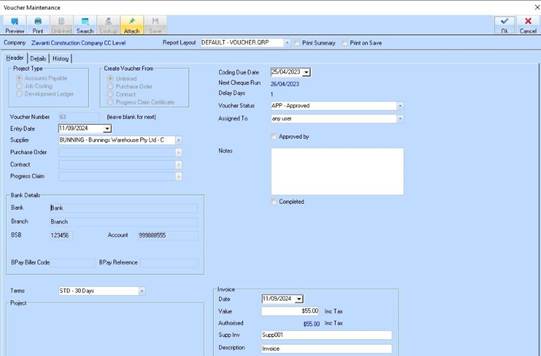
2. The following window will be displayed:
3. Select the New button from the Toolbar. The following window will be displayed:
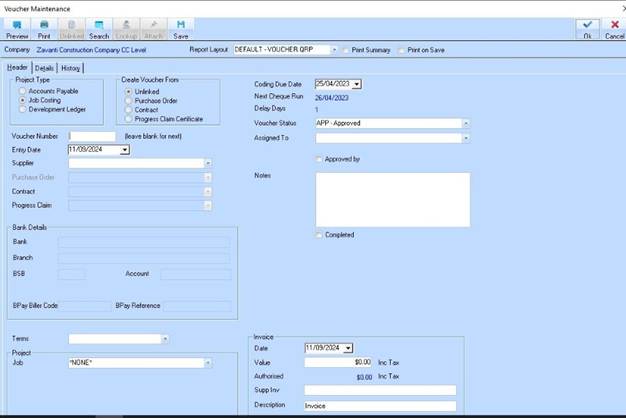
4. The Voucher Number field will default to blank. The system will generate a unique number if the user leaves the field blank. For the purposes of this exercise, we will leave this field blank and press the Tab key.
5. The Entry Date field will default to the current date. Leave the value as defaulted and press the Tab key.
6. A value must be
selected from the Supplier pick list. Select the arrow  from the Supplier pick list. Press
the Tab key.
from the Supplier pick list. Press
the Tab key.
7. Once a Supplier has been selected, the Terms pick list will default to the payment terms specified against the Supplier record. Leave the Terms as defaulted, and press the Tab key.
8. The Project Type radio buttons are used to indicate the type of invoice it is and where it will be posted. For overhead/running cost expenses, the invoice should be posted to Accounts Payable. For job cost expenses, the invoice should be posted to the Job Costing or Development Ledger. For this exercise, leave the Accounts Payable radio button selected and press the Tab key.
9. The Coding Due Date will default to the current date and is used to indicate when action is required by.
10. The Status pick list is used to denote where the Voucher and invoice are at within the process. Select a value from the pick list and press the Tab key.
|
|
A user may create new items within a code list by using the Maintenance function or by right clicking the field and selecting New. |
11. The Assigned to pick list allows a user to select the person within their organisation that will action the voucher. Select a value from the list and press the Tab key.
12. The Notes field allows a user to specify instructions or further details of the invoice. Enter a value and press the Tab key.
13. This Invoice section is to capture the details of the Invoice. The Invoice Date field is for the date on the Invoice. The system will default the value to the current date. Select a date in the past and press the Tab key.
14. The Value field is required to capture the amount of the invoice. This should be the total amount payable (i.e. inclusive of any taxes) and should be entered in dollars and cents. Press the Tab key.
15. The Supplier Inv field is used to input the Supplier’s reference that is the Invoice number. Enter a value and press the Tab key.
16. The Authorised field is used when the entry in the Details tab has been completed and an authorised amount assigned to the voucher.
17. The Description field is used to enter a short description of the invoice. Type in a short description and press the Tab key.
18. The Completed  check box
will default to blank. This is used to indicate when the voucher has been
actioned. Leave the check box blank.
check box
will default to blank. This is used to indicate when the voucher has been
actioned. Leave the check box blank.
19. Select the Details tab. The following window will be displayed:
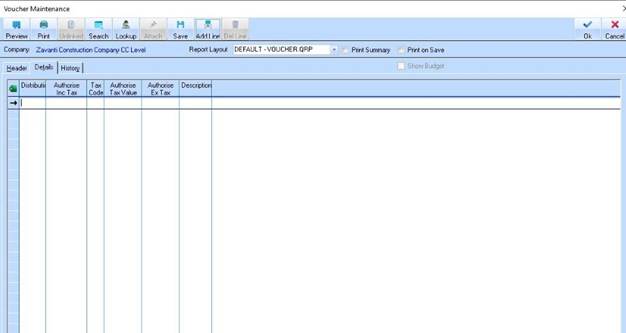
20. Select the Add Line button. The line will now be enabled for entering details of the invoice. The cursor will be positioned in the Distribution field. Select the Lookup button. The Distribution Code list will be displayed as follows:
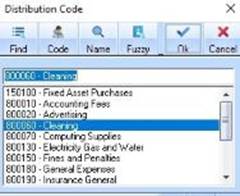
21. Select a code from the list and press the OK button. Press the Tab key.
22. In the Authorise field, enter the amount of the Invoice. Press the Save button. Attach Document to Voucher
An enhancement has been made to the Voucher Maintenance functionality that now allows you to 'attach' any scanned document or electronic file. This will be particularly useful for Voucher users who wish to allow users to review the 'invoice' through the Voucher approval process without having to circulate the physical document. Users can now click on the 'attach' button on the Voucher maintenance detail window to attach, or view any document previously attached.
To use this function:
1. Open the Voucher you wish to attach a document to.
2. Click on the Attach button located on the Toolbar. A standard windows file dialog box will open.
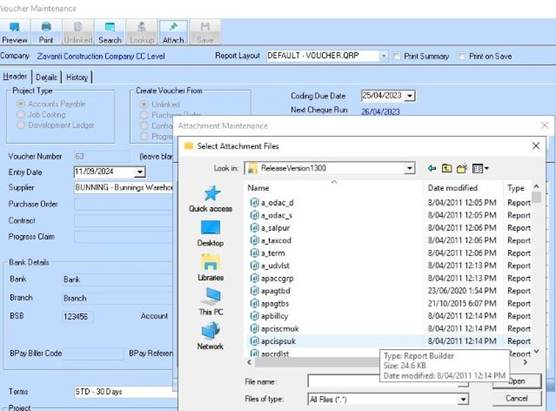
3. Navigate to the file you want to attach to this Voucher, by clicking 'FIND' and click Open.
4. For example, it doesn’t matter which document we choose. However, this document may be a fax that we receive from the supplier, or client, or any other data that we wish to attach to this Voucher.
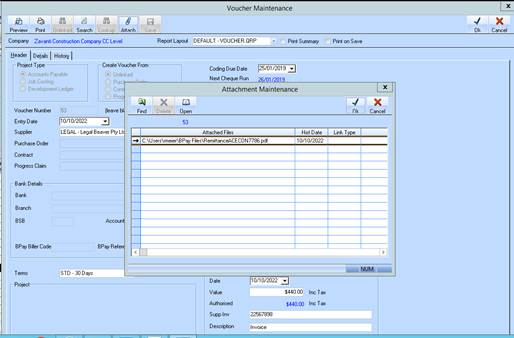
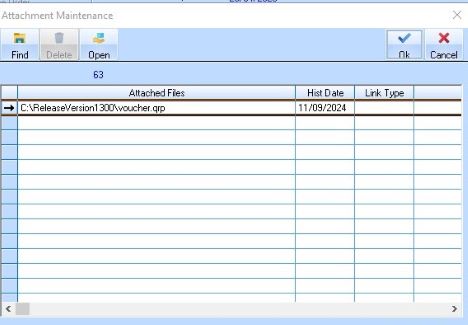
5. Select a Link Type if applicable. Please note, these link types can be maintained in the Contract Management module.
6. Enter notes for the document in the Notes column.
7. Click on OK to confirm.