Creating Forecasts
The following is a simple guide on understanding the
Forecasting module, and how to create new forecasts.
1.
Open the Forecasting module.
2.
A list of all the jobs will appear.
3.
To view only jobs with previous forecasts against them, select View > Jobs
with forecasts only (this will put a tick next to this selection). To change the
view back to all jobs, select View > Jobs with forecasts only (this will
remove the tick from this selection).
4.
Highlight one of the jobs and press Forecast.
5.
Check the Last Actual Date and Last Forecast Date and press Refresh.
Please
note the Last Forecast Date will need to be after the Last Actual Date. By
default, the Last Actual date will be one month past the “Current Period (as set
in the Systems Maintenance module) and the Last Forecast Date will be the last
period set up in the Systems Maintenance module.
6.
All lines will appear in red if the current budget has not yet been forecasted.
The amount remaining to be forecasted will appear in the expired column.
|

|
The Forecasting module has the capability to set a
“Scroll Region” by selecting View > Scroll Region. A “scroll region”
determines which columns are locked into place on the window, and which
ones can be scrolled left to right. If you are having difficulties viewing
some of the columns, check the scroll region to see which columns you have
locked in place (a tick will appear next to the last column locked).
|
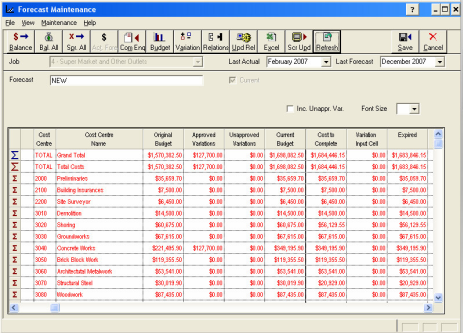
7.
To maintain the forecast for one of the lines, highlight the line and press Act.
Fore.
8.
To enter the forecasted costs for one of the particular items, press Spread.
9.
Enter the starting month for the budget, the amount per interval, the number
intervals, and the type of interval.
•
E.g. for an item with a cost of $1500 a month starting in February 2007
and occurring until July 2007, the starting month would be February 2007, the
amount would be $1500 with 6 period intervals set to monthly.
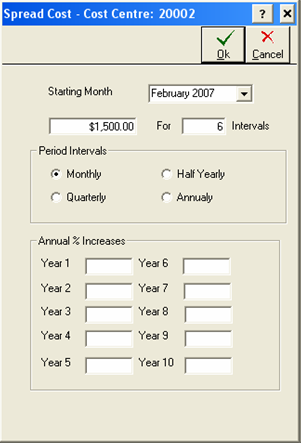
10. Press OK to
save your changes.
11. It is
possible to update one of the lines in the Forecast by clicking directly into
one of the columns for the line, and typing in the new information.
12. Press OK to
the item to update the changes.
13. To enter a
forecast matching the original budget (i.e. all expired amounts will be
forecasted) into the next period after the current period, select Bal. all.
14. A message
will appear advising that you are about to Auto Balance all expired amounts for
the job. To proceed, press Yes.
15. All expired
amounts will be used, and all lines for the forecast will turn black.
16. Press Save
to accept the changes, and close the forecasting module.